
Mechanical keyboards have gained popularity among computer enthusiasts and gamers due to their superior tactile feedback and durability. However, regular cleaning is necessary to ensure optimal performance and longevity.
Let’s discuss how to effectively and safely clean a mechanical keyboard and provide step-by-step instructions for the process. We’ll also recommend popular tools that are easy to use at home.
What is a mechanical keyboard and why does it need cleaning?
A mechanical keyboard is a type of keyboard that uses mechanical switches to register key presses. Unlike conventional membrane keyboards, where the click is registered using a conducting membrane, mechanical keyboards have individual switches under each key. This provides superior feedback while typing and greater durability compared to membrane input devices.
However, over time, mechanical switches and gaps between keycaps can accumulate dirt, dust, and finger grease. This can lead to sticky keys, reduced sensitivity, and operational issues. Moreover, using a dirty keyboard can be unpleasant and potentially harmful to health.
Regular cleaning helps maintain optimal performance and extends the lifespan of a mechanical keyboard.
Preparatory Steps
Before starting the cleaning process, it is important to gather the necessary tools and take some precautions. This includes disconnecting the keyboard, preparing a clean and well-lit workspace, and familiarizing yourself with the user manual for beginners.
During the preparation stage, you will need the following tools and materials:
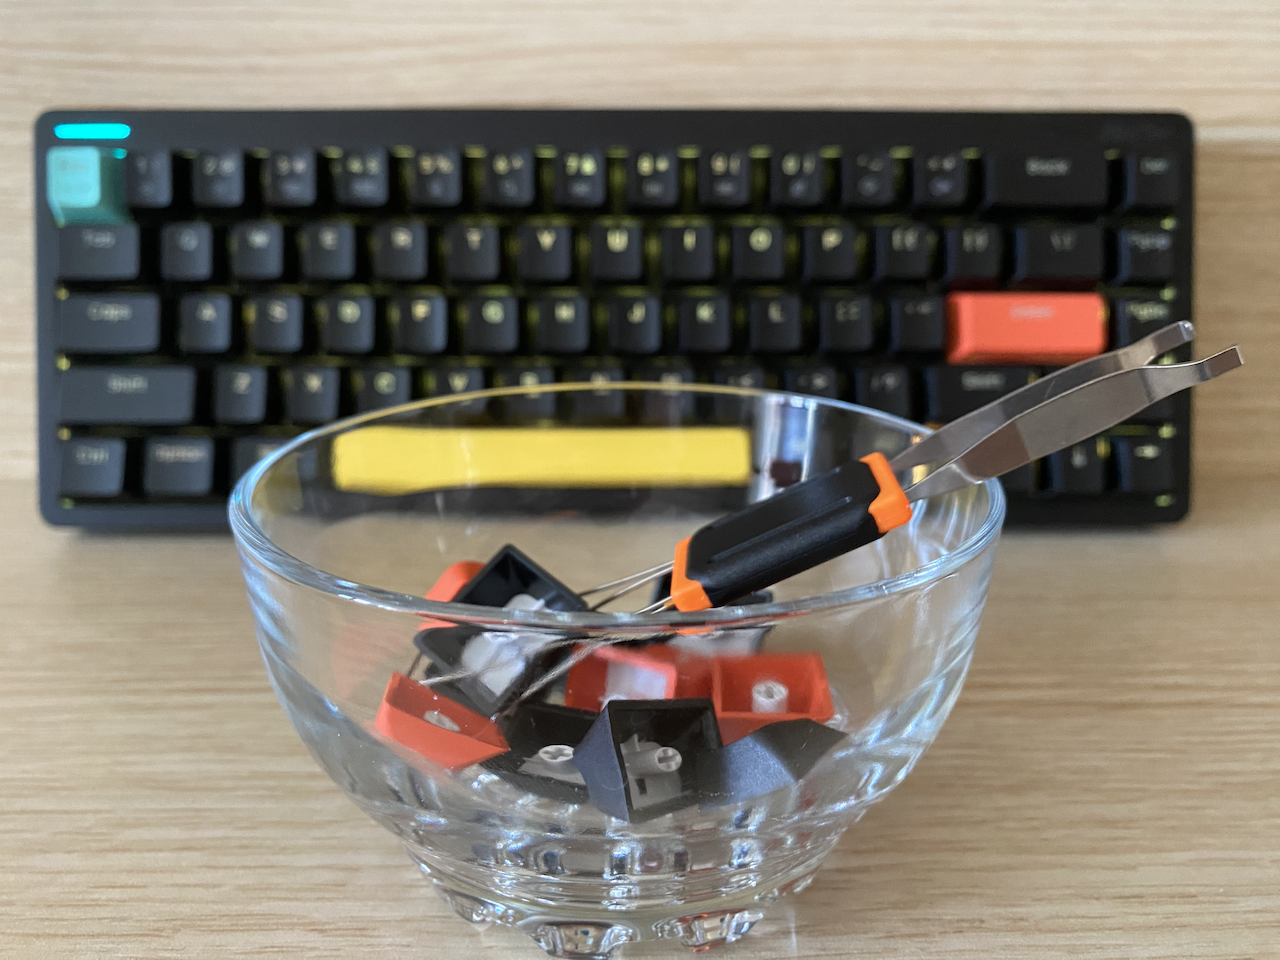
- Keycap puller: This specialized tool helps remove keycaps from the keyboard without causing any damage. It can have the form of a hook or tweezers designed for grasping and pulling keycaps.
- Soft brush or brush: This will help remove dust, dirt, and small particles from the keyboard’s surface and between the keys. Choose a brush with soft bristles to avoid damaging the keycaps or switches.
- Wet wipes, soft cloth: Use these for wiping the surface of the keycaps and keyboard casing. Microfiber cloth is preferable as it doesn’t leave lint.
- Cleaner: Apply the cleaner to a soft cloth and wipe the surface of the keycaps. Avoid directly applying the cleaner to the keys.
- Slime: This not-so-pleasant-to-touch blob of chemical slime is simple yet effective.
- Plastic bags or a bowl: These will be useful for temporarily storing the removed keycaps during cleaning, preventing loss or confusion.
- Transparent film or tape: This will come in handy if you plan to remove the keycaps using this method.
Beginners may need additional markers or labels. Use them to mark the position of the keys before cleaning, making it easier to reassemble the keyboard, especially for keyboards with specific layouts.
Preventive Cleaning
Preventive cleaning of a mechanical keyboard helps maintain optimal cleanliness and functionality of the device. It should be done as the keycaps become dirty, and keys should be disinfected daily or immediately before use.
Before starting the cleaning process, make sure the keyboard is disconnected from the computer. This ensures safety and prevents damage to the keyboard or computer.
Step-by-step instructions on how to perform preventive cleaning of a mechanical keyboard:
- Use compressed air to blow away dust and debris from the keyboard, paying extra attention to the gaps between the keys.
- Clean the keycaps of the mechanical keyboard with disinfecting wipes, a damp microfiber cloth, or a cotton pad.
- Wipe the keyboard with a dry material, then connect it to the computer and test its functionality.
For preventive cleaning of the keys, you can use slime (a sticky substance). Spread the slime on the keyboard and collect any debris that sticks to it. The keys will become clean and shiny but slightly sticky. This method is particularly effective for cleaning non-mechanical laptop keyboards.
Performing preventive cleaning of a mechanical keyboard helps maintain its functionality and prolong its lifespan. Additionally, adopting good habits such as keeping hands clean and avoiding eating or drinking near the keyboard minimizes the accumulation of dirt.
Deep Cleaning of the Keyboard
Deep cleaning of a mechanical keyboard is a more thorough process that is recommended to be done every six months. It can be done more frequently in case of heavy soiling or if issues arise.
Before starting the process, ensure that the computer is turned off and the keyboard is disconnected from it. This guarantees safety and prevents damage to the devices.
Step-by-step instructions on how to perform deep cleaning of a mechanical keyboard:
1. Removing Keycaps
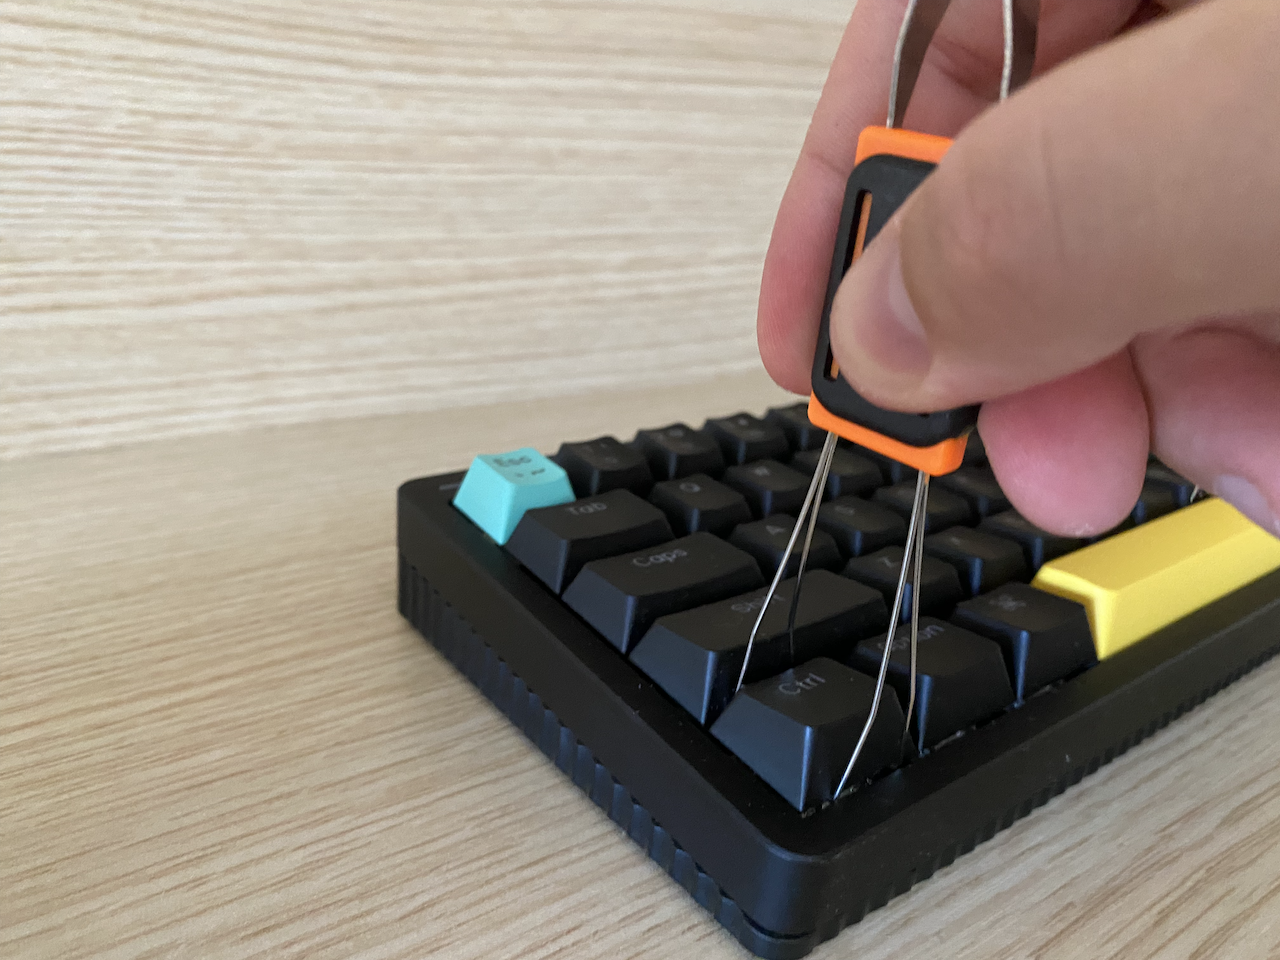
Use a keycap puller to carefully remove the keycaps. Position the tool under the edge of the keycap and lift it gently. Repeat this operation for each key you want to clean.
2. Cleaning the Keycaps
Soak the removed keycaps in a bowl of warm water with liquid soap. Leave them for a couple of hours, stirring occasionally.
If the keycaps are heavily soiled or stained, you can use a specialized cleaning solution like “SUPER CLEAN.” Apply it to a soft cloth and wipe the surface of the keys.
3. Cleaning the Switches and Keyboard Housing
After removing the keycaps, clean the mechanical switches and the housing. Use a soft brush, USB fan, handheld vacuum cleaner, or compressed air to remove dust, crumbs, and debris. Gently scrape off any stubborn dirt with a moistened cotton swab. Pay special attention to the gaps between the switches and wipe them with a slightly damp cloth.
Wipe the housing with a cloth dampened in a soapy solution, then dry it thoroughly. For stubborn stains, you can gently rub them with a sponge or carefully scrape them off with a plastic scraper (e.g., a bank card).
4. Drying and Reassembling
Ensure that the keycaps and keyboard housing are completely dry before reassembling. If you used a moist wipe or soft cloth, allow them to dry for a few minutes. Then, carefully place each keycap back into its corresponding position, pressing it down until it clicks.
Keycaps take longer to dry after being soaked. Place them on a paper or towel and periodically flip them over. They should be completely dry before reassembly.
5. Testing
After reassembling, connect the keyboard to the computer and perform testing by pressing each key to ensure they are securely attached and not sticking. Also, check the functionality of the switches and ensure they respond correctly.
Using an Ultrasonic Cleaner
For a more thorough cleaning of a mechanical keyboard, it is recommended to use an ultrasonic cleaner. This is an effective method for removing dirt and grease buildup from hard-to-reach areas such as the gaps between the keys and the key switches. It can help clean expensive keyboards.
Here’s how to use an ultrasonic cleaner:
- Ensure that the device is in working condition and that the tank has no cracks or damage.
- Fill the reservoir with clean water or a specialized cleaning solution according to the manufacturer’s instructions. Typically, water is used for keyboard cleaning.
- Make sure the keyboard is completely disconnected from the computer.
- Carefully place the keyboard into the ultrasonic cleaner’s reservoir, ensuring that all keys and switches are fully submerged in the water.
- Turn on the device, set the timer and power level. It is recommended to clean mechanical keyboards for 5-10 minutes.
- Once the cleaning process is complete, turn off the cleaner and carefully remove the keyboard from the reservoir. There may be residue of dirt and cleaning solution on it—rinse the device under running water or wipe it with a soft damp cloth.
- Allow the keyboard to dry.
- Some ultrasonic cleaners may have removable baskets or stands that hold the keyboard at the desired depth and prevent it from moving inside the reservoir.
When using an ultrasonic cleaner, it is important to observe certain limitations and precautions. Ensure that the keyboard is compatible with ultrasonic cleaning. Some devices may be sensitive to ultrasonic waves.
Never immerse a connected keyboard in water to avoid damaging the electronics or causing a short circuit. Do not use hot water or aggressive chemicals for cleaning, as they may harm the device.
Dealing with Liquid Spills
Accidental spills on a mechanical keyboard can cause issues. To salvage the keyboard, quick and professional action is necessary:
- Immediately disconnect the keyboard from the computer or power source.
- Tilt the device to allow the liquid to drain as much as possible. Gently shake it to remove any remaining water.
- Use a soft absorbent cloth or paper towel to blot away the liquid. Avoid pressing the keys to prevent further penetration of the liquid into the keyboard.
- Carefully clean the keycaps of the mechanical keyboard and the gaps between them to remove any moisture residue, using a soft cloth, towel, or cotton ball. Pay special attention to the keys that were directly affected by the spill.
- If water or tea has seeped under the keys, disassembly and deep cleaning may be required.
Methods and Recipes for Cleaning Mechanical Keyboards
Let’s consider several methods that can help clean a mechanical keyboard on your own, without the need for a service center.
Isopropyl Alcohol or White Vinegar
Isopropyl alcohol and white vinegar are effective agents for preventive cleaning and disinfection of mechanical keyboards. They eliminate bacteria and remove accumulated residue, ensuring cleanliness and functionality of the device.
Here’s how to clean a mechanical keyboard using these substances:
- Dilute isopropyl alcohol or vinegar with water in a 1:1 ratio. This will lower the concentration and prevent damage to the key labels.
- Transfer the resulting solution into a spray bottle.
- Disconnect the keyboard from the computer or power source.
- Spray a small amount of the solution onto a soft cloth.
- Gently wipe each keycap, paying special attention to the gaps between the keys.
- Allow the keyboard to fully dry before using it. It is recommended to leave the device in open air or use a hairdryer on a cool setting to speed up the drying process.
- When using isopropyl alcohol or white vinegar, be cautious and avoid directly spraying the liquid onto the keys. Also, prevent the solution from coming into contact with electronic contacts.
Vacuum Cleaner
Using a vacuum cleaner with an upholstery attachment is an effective method for removing dust, debris, and other particles from a mechanical keyboard. If a vacuum cleaner is not available, you can use a can of compressed air or, as a last resort, a medical syringe.
Experts recommend using a vacuum cleaner once a month. This method helps maintain the cleanliness of mechanical keyboards without much effort.
Dishwashing Liquid
Dishwashing liquid can be used to clean a mechanical keyboard as it effectively removes grease and other protein-based stains.
Prepare a solution by mixing 200 ml of warm water with 1 tablespoon of dishwashing liquid. Place the keycaps in a bowl, pour the water and soap mixture over them, and thoroughly rub them with your fingers or a sponge to remove dirt. Then rinse with running water and dry.
Denture Tablets
Denture tablets can be an effective method for cleaning a mechanical keyboard. These tablets contain active ingredients that help dissolve and remove grease, food residue, and other dirt. Prepare the solution according to the instructions on the product, usually taking 1 tablet for 100-125 ml of water.
You can submerge the mechanical keyboard in the solution, but it is better to remove the keycaps and clean them separately. The recommended soaking time is 15 minutes (keycaps should be fully covered by the solution).
Proper and regular cleaning of a mechanical keyboard is an important procedure to maintain its proper functioning and extend its lifespan. It helps prevent issues such as stuck keys, reduced responsiveness, or overall device malfunction.